Welcome! This is a very basic tutorial on livestreaming with Livestream Studio software running on a computer (Mac, PC, laptop or desktop). This is meant for a person with very little training to control one camera and start, stop, and post a livestream.com event.
This tutorial assumes:
- Your event has already been created in livestream.com
- The program has been downloaded and properly configured for you
- The hardware has either been setup for you or sufficient instruction has been given on how to do this.
Step 1: Start the Program
Find the Livestream Studio icon and start the program
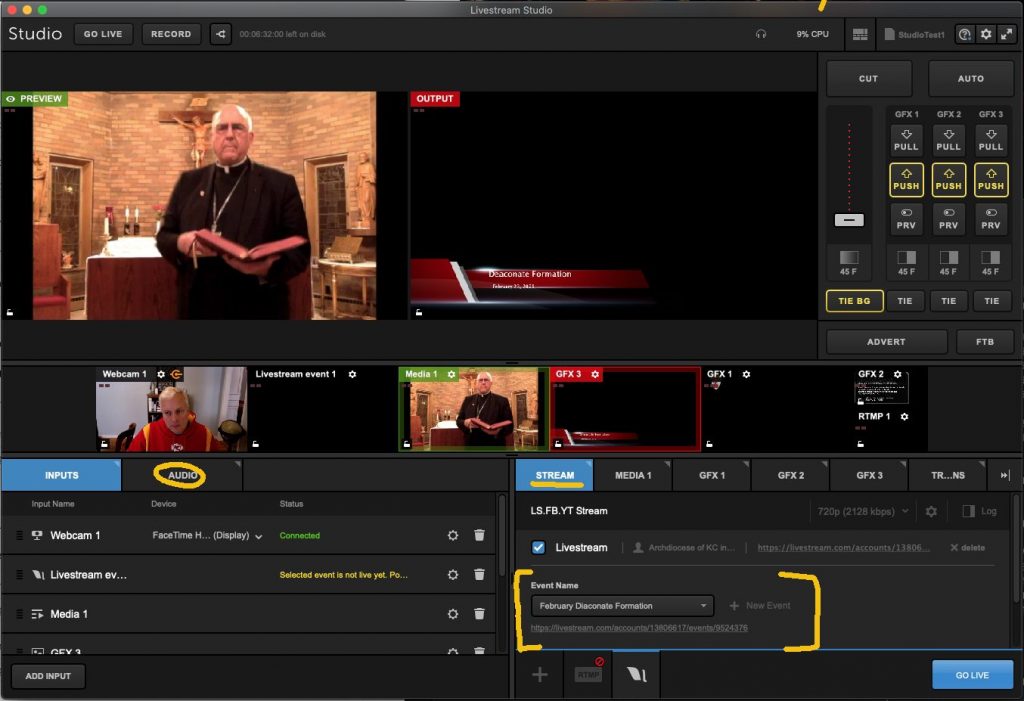
Step 2: Check Livestream Settings
In your program verify your camera is live and in the right hand video window.
Verify the stream is set to your event!
Step 3: GO LIVE
Press the blue ‘GO LIVE” button on the bottom right and you should see Perfect Streaming:
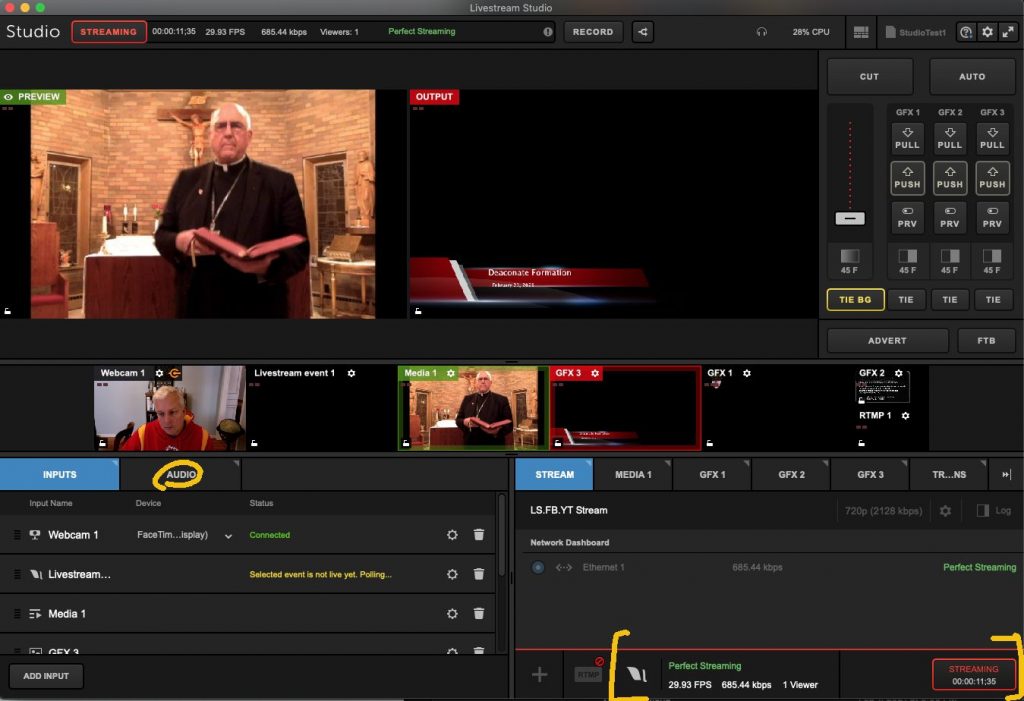
Note: Keep an eye on this to ensure everything is working well.
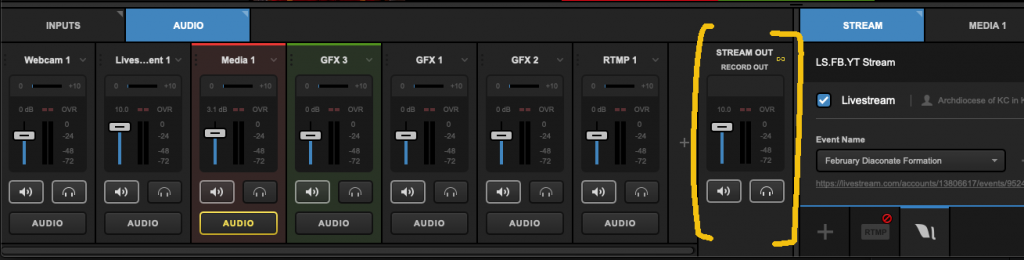
Audio Adjustments
On the lower left click on ‘AUDIO’ tab. There you will have a master out audio control. Set this as high as you can without the audio turning often red at the top. Just a little red flicker is ok, even preferred if very slight.
Verify you are indeed livestreaming!
On another device or computer click on the live link that other have been shared and verify both audio and video. If you don’t have headphones it is better if you are in a different room.
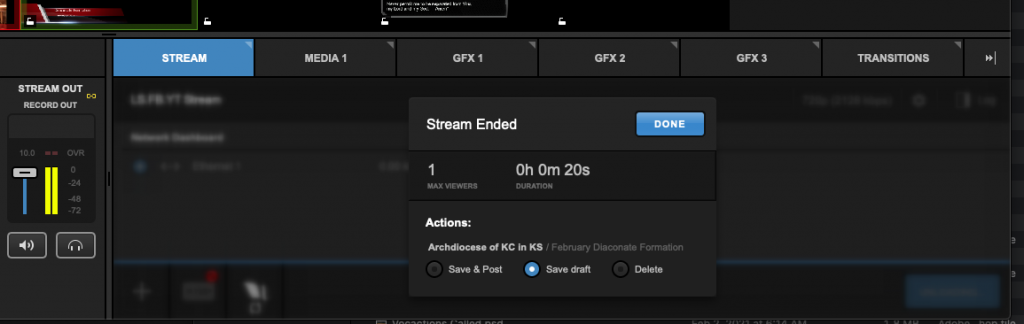
Step 4: Stopping and Saving the Livestream
On the lower right the now red button should be pressed again to stop. You will then see this dialog asking to decide what to do with the video on the server.
- Save & Post
- This makes the live video available to be viewed again by anyone.
- Save draft
- Save the video, but you must have login credentials to view
- Delete
- CAUTION: If you delete by accident there is no getting it back! Be very careful.